Annotating Figures
Annotating Photographs in Microsoft Word
STEP 1: Insert the Image into Microsoft Word
STEP 2: Inserting and Moving Text Boxes
- Insert the image into the Microsoft Word document.
- Centre the image but clicking on the centre option on the tool bar.
STEP 2: Inserting and Moving Text Boxes
- To create a text box, click on the INSERT tab on the tool bar and choose Text Box.
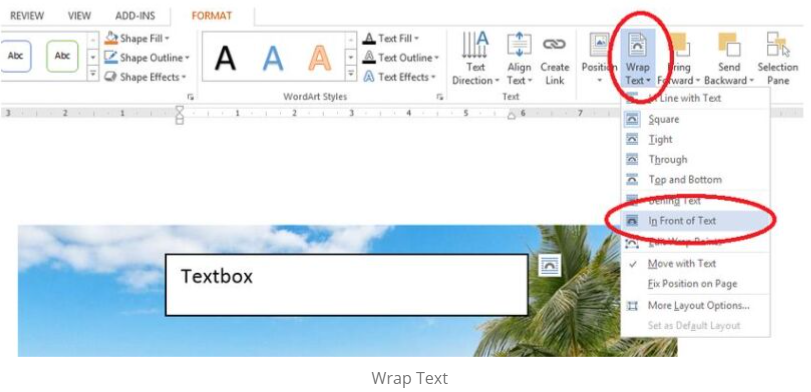
- To move the textbox to where you would like it, click on the text box, click on the SHAPE FORMAT tab, click on Wrap Text and then In Front of Text as shown below. You should now be able to move the textbook to where you would like.
- You can shrink or stretch your textbox to size it how you would like.
- You can now enter annotations inside the textbox.
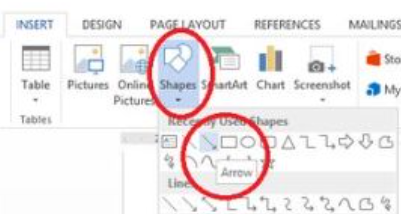
STEP 3: Inserting Arrows
- Click on the INSERT tab.
- Click on Shapes.
- Choose the line arrow.
- You can change the colour of the arrow and make it thicker by clicking on the SHAPE FFORMAT tab.
- 5. To change the thickness of the arrow, click on Shape Outline then Weight.
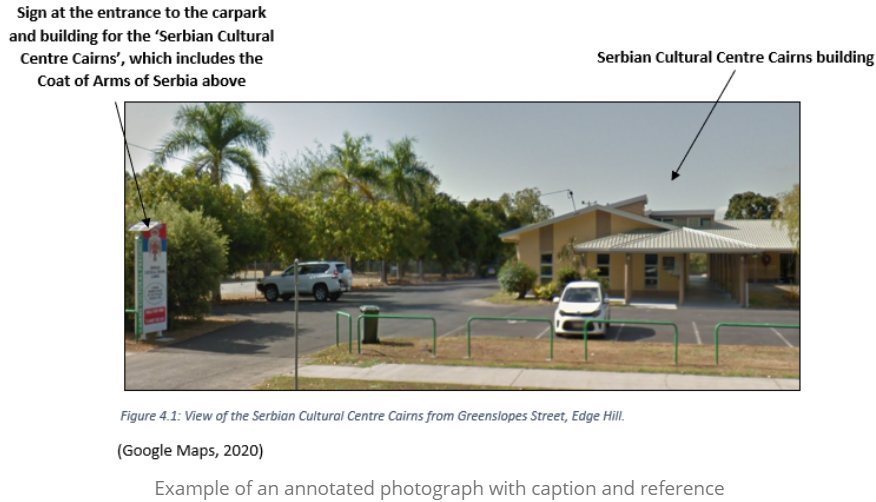
Example of an annotated photograph below:
The annotation is to point out is the Coat of Arms of Serbia on the entrance sign. This key feature is evidence of migration/multiculturalism in the photograph.
You do not need to annotate clear aspects of the photo like the car park or the entrance.
The annotation is to point out is the Coat of Arms of Serbia on the entrance sign. This key feature is evidence of migration/multiculturalism in the photograph.
You do not need to annotate clear aspects of the photo like the car park or the entrance.